In this guide we configure Burp Suite to proxy all the traffic from your phone, tablet or other wifi device. As a bonus you will also have full access to all the WIFI packets for consumption by Wireshark or your traffic analysis tool of choice.
What do I need?
- An old laptop with an Ethernet port and a Wireless adapter
- Ubuntu running on the old laptop. Any Linux will do, but this guide will show you with Ubuntu 14.04
- Burp running on any computer on your local network
How it works
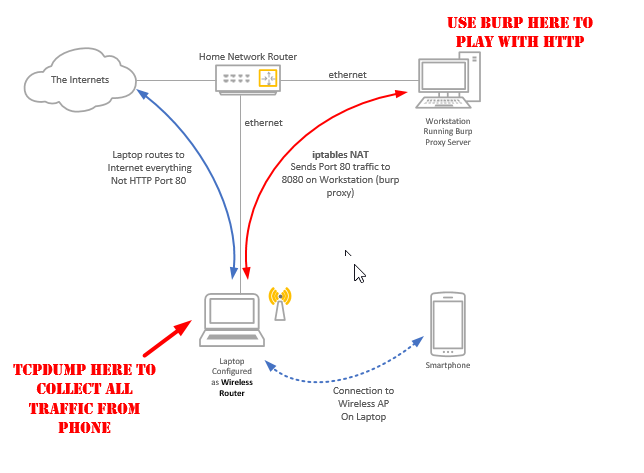
Step 1. Configure the laptop as a Wireless Router
Hook the laptop up to the local network using the Ethernet adapter and make sure you can browse the Internet (using the Ethernet adapter).
Follow these steps to configure using Network Manager a new wireless network in infrastructure mode;
1. Untick the enable wifi option to temporarily disable the WIFI
2. Select edit connections
3. Add new wireless network (set ssid and mode to infrastructure)
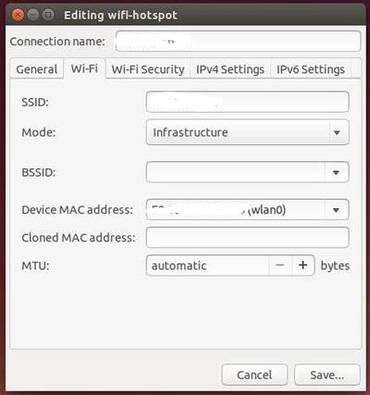
4. Name the access point (mytestingaccesspoint)
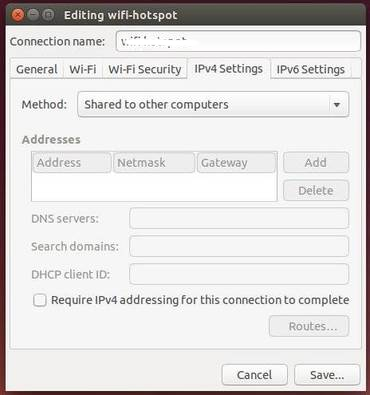
5. In IPv4 change method to "Shared to other computers", this is a quick way to sort out DHCP and NAT for your new wireless network.
6. Set security (set a password)
Edit the file /etc/NetworkManager/system-connections/mytestingaccesspoint
Find the line that has mode=infrastructure and change it to mode=ap. This is required as AP is not an option in Network Manager. Note that not all wireless cards support the AP mode.
Once you have this network (mytestingaccesspoint) enabled, your wireless devices should be able to see it and connect using the password you have set.
If you can browse the network from your mobile device, on your laptop you will see two different IP ranges for your wireless adapter (wlan0) and the ethernet (eth0) adapter. The Ubuntu laptop is forwarding the traffic from the new wireless network onto the Ethernet network and out to the internet.
Try tcpdump -i wlan0 on the laptop. Fire up some apps on your phone or a browser. You should see traffic; this is your mobile device traffic. If your wireless device is not wlan0 you will need to use the correct device in the forward rule below so make sure this works.
That concludes the first part of the guide, getting the mobile device traffic to route through a Linux enabled system.
Step 2. Forward Traffic to Burp for Transparent Proxying
In the second part of the guide we will use an iptables NAT table rule to forward all HTTP port 80 traffic to the Burp Proxy running on another system.
Once we get the HTTP traffic into the Burp proxy server we can view, intercept and even inject on HTTP requests.
It only takes one line, on your Linux based router (the laptop).
iptables -t nat -A PREROUTING -i wlan0 -p tcp --dport 80 -j DNAT --to 192.168.1.100:8080
Now in Burp you need to set the proxy to listen on all IP addresses and there are two other options that are required for transparent proxying.
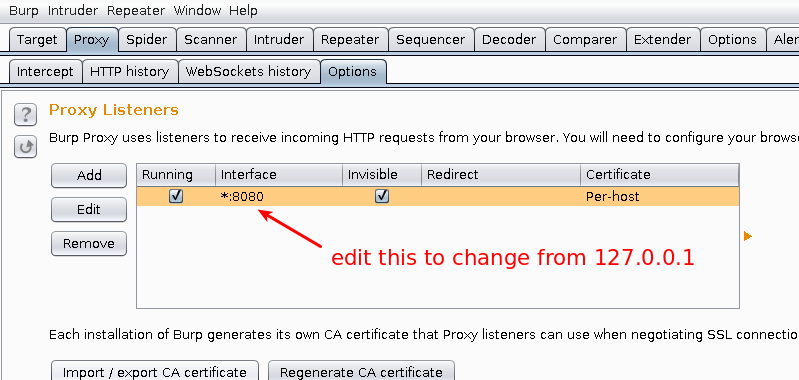
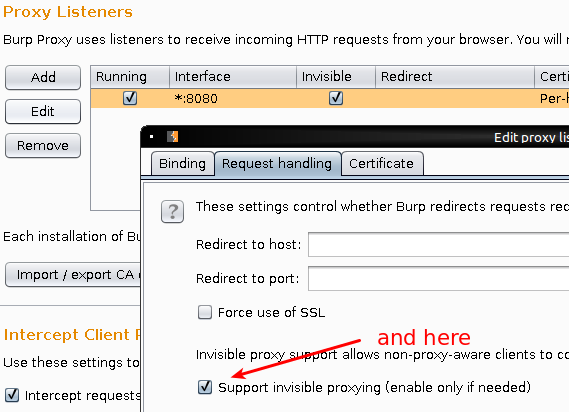
1. Select the Proxy Tab | Options | Edit the Running Proxy | Change to Bind All interfaces
2. While you are here select "Request Handling" and tick the option to Support invisible proxying (if you need this). Without it you will likely get an error when you attempt to proxy the HTTP traffic transparently.
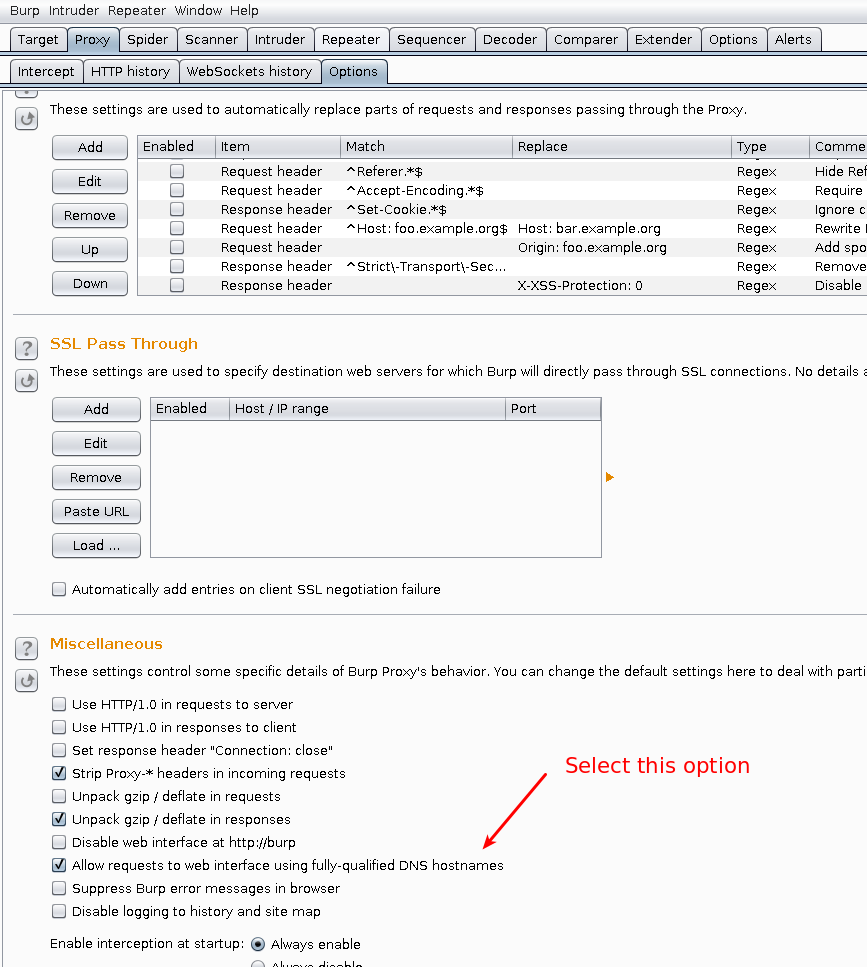
3. Still on the Proxy Options Tab, scroll down to the bottom and select the "Allow Requests to web interface using fully qualified DNS hostnames"
dd-wrt as an alternative
If you have a compatible router you might be able to use dd-wrt or other firmware project to install Linux on your SOHO router. With Linux on your router you could use a similar port forward rule to push port 80 traffic to burp. There are lots of options available, one of the advantages of the old laptop method is if you mess up on the Laptop the rest of the household can still use the Internet (unless of course you really mess it up). Have fun.
